An Ultimate Guide to Recover Data from Iomega 1TB External Hard Drive
"I have Iomega external hard drive whose storage capacity is 1TB. So due to its high storage capacity, I stored lots of data on it such as movie files, image files, music, Word documents, PowerPoint files, spreadsheets and much more. But yesterday, I accidentally formatted my Iomega 1TB external hard drive due to which I lost all the data stored on it. The data which I have lost from Iomega external drive is really important to me as it contains both my personal and professional data and even I don't have backup of my essential data to restore back. So someone please tell me how to recover Iomega 1TB external hard drive data."
It is very common scenarios due to which most of the users lose data from thier storage devices. But you don’t have to worry about this problem or Iomega 1TB external hard drive recovery because, this recovery task can be easily performed by using an advanced recovery tool named as Iomega Data Recovery Software. But before making use of this tool to restore Iomega 1TB external hdd data, you need to avoid using your external hdd or to add new content to it. Because, once the lost or deleted data is overwritten by some new files, then it will be difficult to retrieve Iomega 1TB external hard drive data.
If you are not able to access or read data due to corrupted or damaged Iomega drive, then also you don’t have to get tensed! Because, Iomega data recovery software will help you to recover data even after corruption of your storage device. Along with Iomega 1TB external hard drive recovery, this effective utility also facilitates you to perform Iomega eGo data recovery in short fraction of time.
This tool is very useful for recovering lost or inaccessible data from numerous Network Attached Storage devices just like Iomega StorCenter.
Factors leading to deletion & loss of files from Iomega 1TB hard drive
- Improper ejection of Iomega 1TB external hdd from your system or laptop while transferring or accessing data from it will result in huge loss of data from your Iomega hard drive.
- File system comprises of essential information about the device or drive. So if the file system of your Iomega 1TB external hdd gets corrupted or damaged, then you will not be able to access data from it.
- If your Iomega 1TB external hard drive is infected by some external threats like virus or malwares, then the data stored on it may get corrupt or damaged. As a result of this, your data becomes inaccessible which leads to data loss from Iomega 1TB external hdd.
- Sometimes, you won't be able to access data from your Iomega hard drive due to "Formatting Errors" i.e., if your external hard drive is corrupted then you may come across this kind of error. As a result of this error or corrupt drive, you may lose data from your Iomega 1TB external hdd.
Improper defragmentation, power surge, use of third party application, bad sectors etc. are several other reasons that result in data loss or deletion from Iomega hard drive. But Iomega data recovery software works perfectly under all these scenarios, and let you know how to recover Iomega external hard drive within a short span of time.
Important Note: Once you have lost or deleted files from your Iomega 1 TB hard drive, and want to recover those deleted files, then immediately stop further usage of the hard drive. Actually, when the files are deleted from Iomega hard drive, only the memory space occupied by the files just lost/deleted, are freedup and made available for new files to be saved. Unless and untill the new files are not saved in that memory location of the hard drive, you can easily restore deleted files back from Iomega hardc drive. If the deleted files are replaced with new files on Iomega hard drive, then it's impossible to regain those files back.
Free Iomega Data Recovery Software to Recover Data from Iomega 1TB External Hard Drive
Iomega Data Recovery is an excellent and highly rated tool, which has been suggested by industry professionals to retrieve Iomega 1TB external hard disk data. It supports data recovery from RAID and FAT, NTFS, ExFAT, HFS and HFSX partitions. So, this application is useful to perform Iomega RAID data recovery. This utility has an ability to find and restore 300 types of files including media files and all other data files. It has simple GUI that helps even novice user to know how to recover Iomega 1TB external hard drive data without any technical guidance.
It also has strong scanning programs to scan your entire 1TB of Iomega drive to restore lost or deleted data from it. Along with Iomega 1TB external hard drive recovery; it is capable to recover data from other internal and external drive types like SATA, IDE, SCSI and brands like WD, Toshiba, Seagate, Sony, LaCie etc. This application also helps you to recover deleted files from Iomega external hard drive, corrupted SD cards, USB drives etc. Using this tool, you can perform data recovery from Iomega 1TB external hard drive as well as Iomega Prestige data recovery on both Windows and Mac OS. It facilitates you to Preview the recovered data prior to restoration.
Steps to Recover Files from Iomega 1TB External Hard Drive:
Step 1: Download, and install free version of Iomega Data Recovery Tool on your computer. Connect Iomega hard drive to the system, in which the software has been installed. Launch the tool and select your Iomega external hard drive, and hit Scan button to initiate the scanning process.
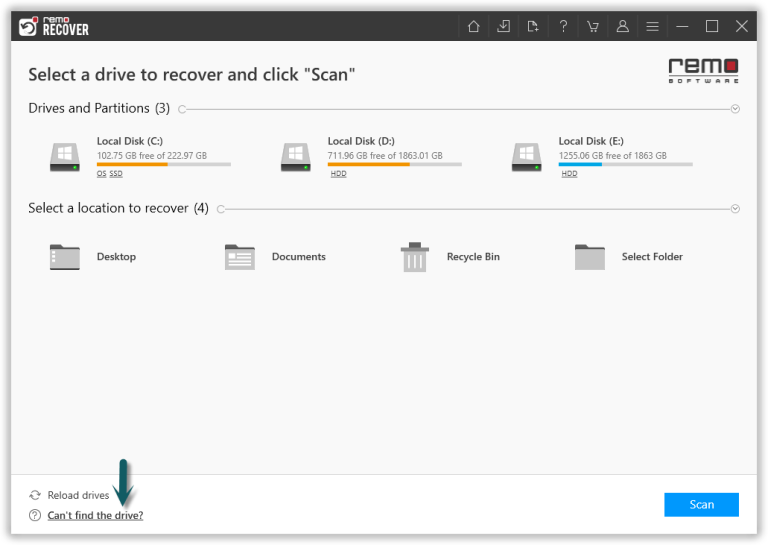
Figure 1: Main Screen
Step 2: The software now scans the Iomega drive, just wait for the tool to complete the scanning process. Upon the completion of quick scan, you can view the recovered files (during which deep scan will be in progress).

Figure 2: Software scanning the drive to find deleted & lost files
Step 3: Before saving the recovered files, just double-click on the file to preview the recovered file to evaluate the recovery results of the software.

Figure 3: Preview Recovered Files
Step 4: Finally, select the files you want to recover, and save them at the desired location of your choice.

Figure 4: Save Recovered Data